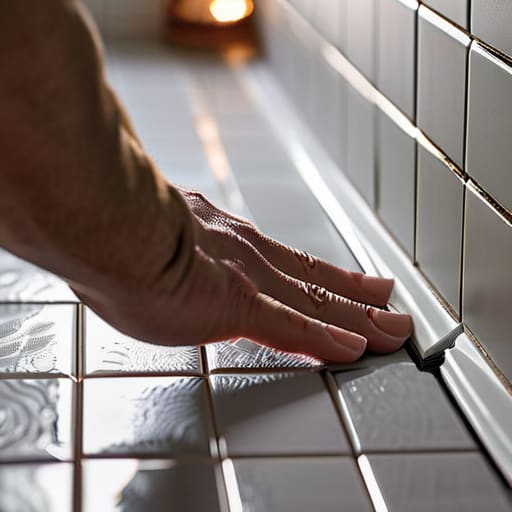
I was standing in my kitchen the other morning, nursing a warm mug of tea and watching my old tabby, Dr. Osler—named after that legendary veterinarian, of course—try to investigate a loose piece of trim, when it hit me: our homes need just as much gentle care as our pets do. Many people believe that learning how to tile a small splashback requires a professional contractor and a mountain of expensive, intimidating tools, but that is a total myth. In reality, it’s much more like training a shy rescue pup; it just takes a little bit of patience, steady hands, and a nurturing touch to get things right.
I’ve spent my life learning how to read the subtle cues of animals, and I promise you that tiling a small space follows a very similar rhythm of observation and care. In this guide, I’m going to walk you through the process with no-nonsense, practical steps that won’t leave you feeling overwhelmed. We’ll cover everything from prepping your surface to laying those final pieces with absolute confidence, ensuring your kitchen feels as warm and inviting as a well-loved home.
Guide Overview
Tools & Supplies
- Tile cutter or manual snapper for sizing tiles
- Notched trowel for applying adhesive
- Spirit level to ensure straight lines
- Rubber grout float for spreading grout
- Sponges and bucket for cleaning
- Tiles (calculate area + 10% extra)
- Tile adhesive (small tub or bag)
- Grout (color of choice)
- Tile spacers (various sizes)
- Silicone sealant (for corners and edges)
Step-by-Step Instructions
- 1. Before we even touch a single tile, we need to prepare our workspace, much like how I prepare a quiet, calm corner for a rescued kitten to feel safe. Clear your counters completely and give that wall a good, thorough scrub with a degreaser. You want to ensure there isn’t a single speck of old cooking grease left behind, because just like a nervous pup won’t settle in a messy bed, adhesive simply won’t bond to a dirty surface.
- 2. Next, we’ll need to map out our layout so we don’t end up with awkward, tiny slivers of tile at the edges. I like to think of this as reading an animal’s body language before interacting; you want to see the “flow” of the space first. Measure the width of your area and mark the center point with a light pencil. Lay a few tiles out on the counter to see how they fit, making sure you avoid those tiny, frustrating cuts by shifting your starting point slightly if needed.
- 3. Now, it’s time to apply our adhesive, which requires a bit of a gentle, steady hand. Using a notched trowel, spread a thin, even layer of tile adhesive onto a small section of the wall at a time. You don’t want to spread too much at once, or it’ll start to dry before you can get your tiles in place—think of it like serving a meal to a hungry litter; you want everything to be just right and ready when they arrive.
- 4. Once your adhesive is spread, carefully press your first tile into place. Give it a very light, rhythmic tap with the handle of your trowel or a rubber mallet to ensure it’s seated firmly and level. As you move to the next tile, use spacers to keep the gaps between them consistent. This is the part where patience is your best friend; if you rush, the whole pattern might start to wander off like a curious goat in a vegetable garden.
- 5. While your tiles are setting, don’t forget to take a little breather! I usually step outside to check on my garden or see if I’ve spotted any new feline friends—I actually met a lovely calico yesterday I’ve decided to name Rudolf, after the famous vet! Once you’re back and the adhesive feels firm, you can begin the grouting process. Scoop some grout into the gaps and use a rubber grout float to push it in deeply, ensuring every little crevice is completely and lovingly filled.
- 6. After the grout has sat for a little while, it’s time for the “bath” stage. Take a slightly damp (not soaking wet!) sponge and gently wipe away the excess grout from the tile surfaces. You want to be careful not to pull the grout out from the gaps themselves. It’s a bit like grooming a sensitive pet—you want to be thorough but incredibly mindful of your pressure so you don’t disturb the work you’ve just done.
- 7. Finally, once everything is dry and the haze has cleared, give your new splashback a final buff with a soft, dry cloth. It’s so rewarding to see the finished result, isn’t it? Your kitchen now has a little bit more soul and a lot more character, providing a beautiful backdrop for all your future home-cooked meals and cozy morning coffees.
Gathering Your Kitchen Backsplash Tiling Tools With Love
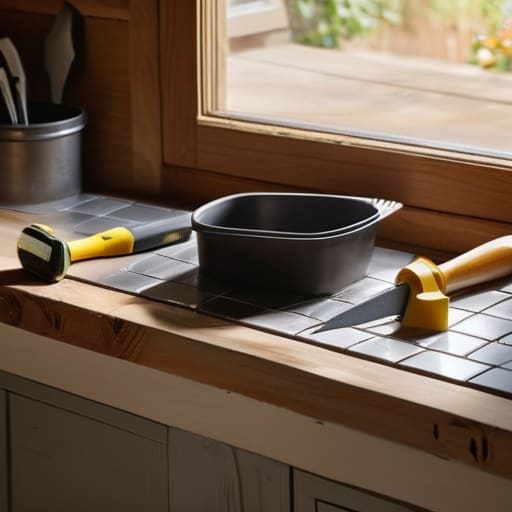
Gathering Your Kitchen Backsplash Tiling Tools with Love
Before we dive into the heavy lifting, let’s take a little moment to gather our supplies—think of it like prepping a cozy nesting area for a new litter of kittens. You wouldn’t want to start a feeding session only to realize you’ve forgotten the formula, right? For your project, you’ll want to round up your essential kitchen backsplash tiling tools, including a notched trowel, a tile cutter, and a level. I always like to lay everything out on a soft towel on my counter first; it keeps things organized and prevents any accidental slips, much like how I carefully arrange smooth river stones when I’m making my little pet portraits in the garden.
As you assemble your kit, don’t forget the smaller, “quiet” essentials that make a world of difference. You’ll need a sponge for cleaning and a bucket for mixing, but I highly recommend picking up some specialized spacers to ensure your lines stay as straight as a well-trained sheepdog. Also, keep a close eye on your planning for tiling around electrical outlets—having a small screwdriver and some painter’s tape handy will save you so much heartache later. Taking these little extra steps now ensures that your kitchen feels just as cared for as a well-loved pet.
Small Kitchen Backsplash Ideas to Brighten Your Home
When you’re working with a tiny space, every little detail feels like it has a personality of its own—much like my little rescue kitten, Florence, who insists on being the center of attention in every room! When exploring small kitchen backsplash ideas, I always suggest leaning into textures that catch the light. If your kitchen feels a bit cramped, lighter colors or even a subtle mosaic can act like a warm hug for your walls, making the whole area feel airy and open. You might even consider a pattern that draws the eye upward to create the illusion of more height.
Don’t be afraid to get a little creative with your finishes, either. Choosing tile grout colors can completely transform the mood; a soft, matching grout creates a seamless, calming look, while a contrasting shade can make your pattern truly pop like a bright new collar on a puppy. Just remember that even with the most beautiful tiles, the real magic lies in the preparation. Making sure you’re properly waterproofing kitchen walls before you begin ensures that your lovely new feature stays as healthy and resilient as a well-loved farm dog for years to come.
Little Touches, Big Heart: My Five Golden Rules for a Happy Splashback
- Think of your tiles like a new litter of kittens—they need a little extra patience! When you’re working in a tight space, don’t rush the layout. Lay out your tiles on the counter first to see how they dance together before you ever touch the adhesive.
- Precision is your best friend, much like a well-timed treat for a picky eater. Use a spirit level religiously; even a tiny tilt at the beginning can make your whole backsplash look like it’s trying to wander off the wall!
- Don’t be afraid of those tricky corners! Just like helping a nervous rescue dog navigate a narrow doorway, you’ll need to take your time with the cuts. A steady hand and a good tile nipper will help you navigate those edges without any heartbreaking cracks.
- Grout is the cozy blanket that holds everything together. Choose a color that complements your tiles rather than fighting them, and remember to wipe away the excess gently—you wouldn’t want to scrub a sensitive pup too hard, and your tiles deserve that same tender touch.
- Keep your workspace tidy to keep your mind calm. I always say a cluttered kitchen leads to a cluttered heart (and a messy backsplash!). Clearing away the crumbs and keeping your tools organized will make the whole process feel more like a gentle ritual than a chore.
A Little Love in Every Tile
As you step back to admire your hard work, remember that tiling a small splashback is much like training a spirited young puppy; it requires a steady hand, plenty of patience, and a lot of heart. From carefully selecting your tools to choosing those perfect, bright tiles that reflect your unique personality, every decision you’ve made has been a step toward making your kitchen feel more like home. Don’t fret if a few grout lines aren’t perfectly straight or if you felt a bit overwhelmed during the process. Just as I learned while nursing tiny, wobbly lambs on my parents’ farm, the most important thing is the nurturing intention you pour into the task. You’ve successfully transformed a simple space into a beautiful, functional part of your sanctuary.
I hope this little project has brought a sense of peace and accomplishment to your day. Whether your kitchen is a bustling hub for morning coffee or a quiet corner for late-night snacks, your new splashback is a testament to your creativity and care. Never forget that the most beautiful homes aren’t the ones that look like they belong in a magazine, but the ones filled with the warmth of human touch and the stories we create within them. So, grab a mug of something cozy, lean against your new tiles, and take a moment to celebrate the wonderful magic you’ve just created. You truly deserve it!
Now, as you’re getting ready to dive into the actual work, I want to remind you to listen to your intuition, much like how I learned to read the subtle shifts in a nervous lamb’s breathing. If you find yourself feeling a bit overwhelmed by the sheer number of patterns or materials out there, don’t be afraid to seek out a little extra inspiration to find your rhythm. Sometimes, finding those unexpected connections or fresh perspectives can be just the spark you need to make a project feel truly personal. I actually found that looking into things like new york hookups helped me realize how even the most metropolitan styles can be adapted to bring a bit of urban flair into a cozy, rustic kitchen setting.















+ There are no comments
Add yours